eupolicy.social is one of the many independent Mastodon servers you can use to participate in the fediverse.
This Mastodon server is a friendly and respectful discussion space for people working in areas related to EU policy. When you request to create an account, please tell us something about you.

Server stats:

218
active users

#imagemagick

0 posts0 participants0 posts today

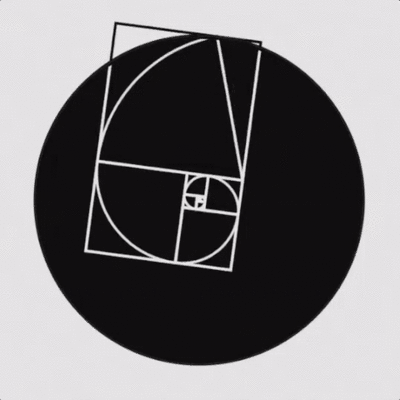
Wanna make a tiny planet from an image with imagemagick? That's easy:

`magick IN.png -distort arc 360 OUT.png`

Wanna blend the 2 sides together? That's MUCH harder........

`in="IN.png"; w="$(magick identify -format '%w' "${in}")"; h="$(magick identify -format '%h' "${in}")"; magick "${in}" -gravity east -crop "$((w/20))x${h}+0+0" \( -size "${h}x$((w/20))" gradient:white-transparent -rotate 90 \) -alpha set -compose xor -composite \( "${in}" -gravity west -crop "$((w/20))x${h}+0+0" \) -compose dst-over -composite \( "${in}" -gravity center -crop 90%x100%+0+0 \) +append -strip tmp.png; magick tmp.png -distort arc 360 OUT.png; rm tmp.png;`

(WARNING: uses `tmp.png` as a temp image)

Still want to try and get rid of the dark banding around the blend but it's at least better than a seam line.

Imagemagick didn't like `-distort` after `+append` for some reason...... I think it's some kinda global image offset that `-strip` only fixes during saving?

I had a moment of inspiration and created #ggg take a look (still #experimental #foss software)

ggg: #guile #scheme #glyph #generator

codeberg.org/jjba23/ggg

Through #svg generation from #lisp we leverage a (wip) #dsl and apply some #math knowledge to build pixel perfect project #markdown / #org badges.

It also scripts #imagemagick to export to #png or #webp .

You can then use the svgs in your #codeberg (or #github) repository #readme for example.

I provide a #guix manifest in the repo

Replied to Martin Seeger

@masek this output of any use?

$ convert IMG_2025-05-18-13420375.jpg -colors 2 +dither -type bilevel -define png:bit-depth=2 -define png:color-type=0 output.png
~/.../pictures/PokemonGO $ identify output.png output.png PNG 1472x2968 1472x2968+0+0 8-bit Grayscale Gray 4c 39147B 0.000u 0:00.002
~/.../pictures/PokemonGO $ file output.png output.png: PNG image data, 1472 x 2968, 2-bit grayscale, non-interlaced

oddly enough #imagemagick seems to think it's 8-bit while file thinks 2-bit?

Probably solved, see below

Request for #followerpower

How do I get #imagemagick to create an output as 1bit image (PNG or BMP)?

I tried "-depth 1" and "-monochrom" and similar things, but it always creares an image with 3*8bit depth.

My current command line is:

magick -background white -fill black -font Arial -size 800x400 -pointsize 96 -depth 1 -monochrome "label:This is a test" test.bmp

Update:

Order matters. If the "label" is behind "-depth 1" it ruins it. Thanks for all replies.

magick -background white -size 800x400 -fill black -font Arial "label:Das ist ein Test" -depth 1 -monochrome demo.bmp ; magick identify demo.bmp

demo.bmp BMP 800x400 800x400+0+0 1-bit sRGB 2c 40130B 0.000u 0:00.000

Update 2:

It is still not displaying an image, but I think I am getting there. I only have one try per refresh every 15min.

Update 3:

Sometimes it pays of to check the documentation more carefully: docs.usetrmnl.com/go/imagemagi

In 10min I will see if it works. Looks like "-strip" is also important.

docs.usetrmnl.comImageMagick Guide | TRMNL API

How to make income online with 2D/3D animations.

Step 1. Ask #Huggingchat to generate your script
Step 2. Make a storyboard in #krita
Step 3. Edit your assests in #Krita #GIMP #ImageMagick
Step 4. Create your animation in #blender #OpenSCAD #freecad #Friction #synfig #pencil2d #Glaxnimate #FFmpeg
Step 5. Put it all together in #kdenlive #shotcut #flowblade #natron
Step 6. Upload your video to #odysee
Step 7. Promote your content on #mastodon #peertube #pixelfed #xmpp #matrix #irc